Home / Blog / The Best Family Photo Collage Ideas for Your Family Photo Phone Case
Personalised Phone CasesThe Best Family Photo Collage Ideas for Your Family Photo Phone Case
Your phone goes everywhere, so it is the easiest place to keep your favourite people close. If you are planning a family photo phone case, a smart collage layout will make it look designed rather than thrown together. Below are tried and tested ideas we use when helping customers at Design My Case, plus real examples and print tips so you get a crisp finish first time.
Family photo phone case layouts that always work
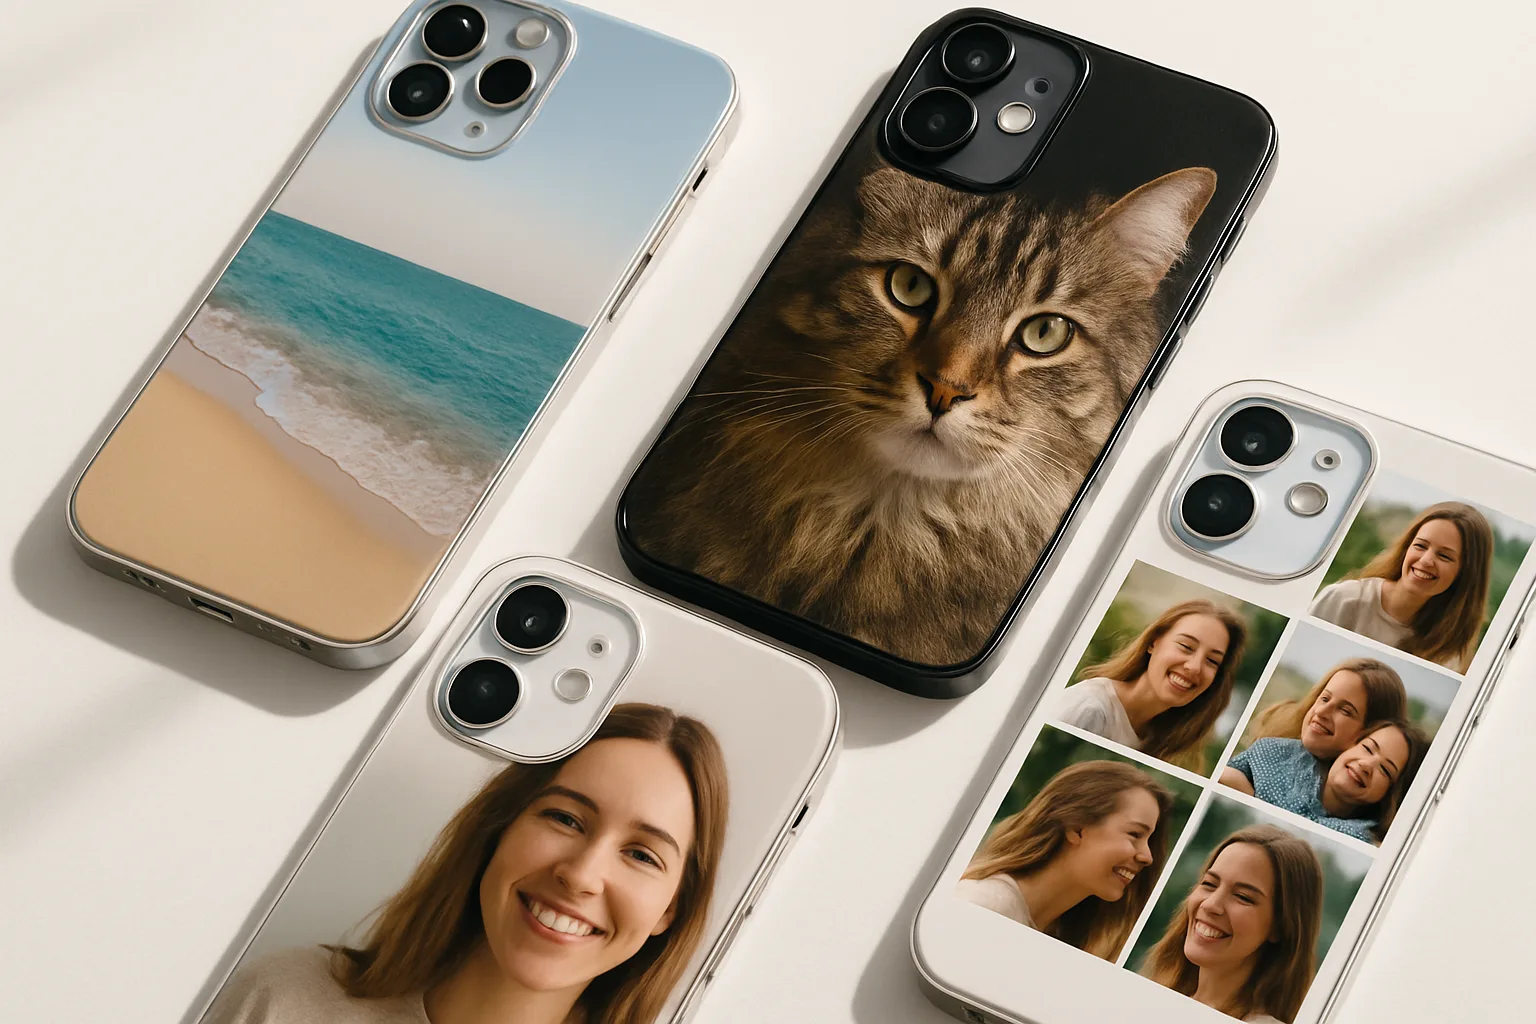
1) Clean 3 by 3 grid
Nine squares, equal spacing, tidy margins. This classic suits almost any handset because it adapts well around a camera cut-out. Choose one close-up per square, avoid busy backgrounds, and keep similar crop heights so faces align. If you have a mix of portrait and landscape shots, crop everything to a square for a neat look.
2) Film strip down the side
Stack three narrow rectangles vertically along the left or right. It draws the eye, leaves breathing room for a short caption, and often sits clear of larger camera modules. We use this a lot for iPhone and Samsung models with taller bodies because it looks balanced without feeling cramped.
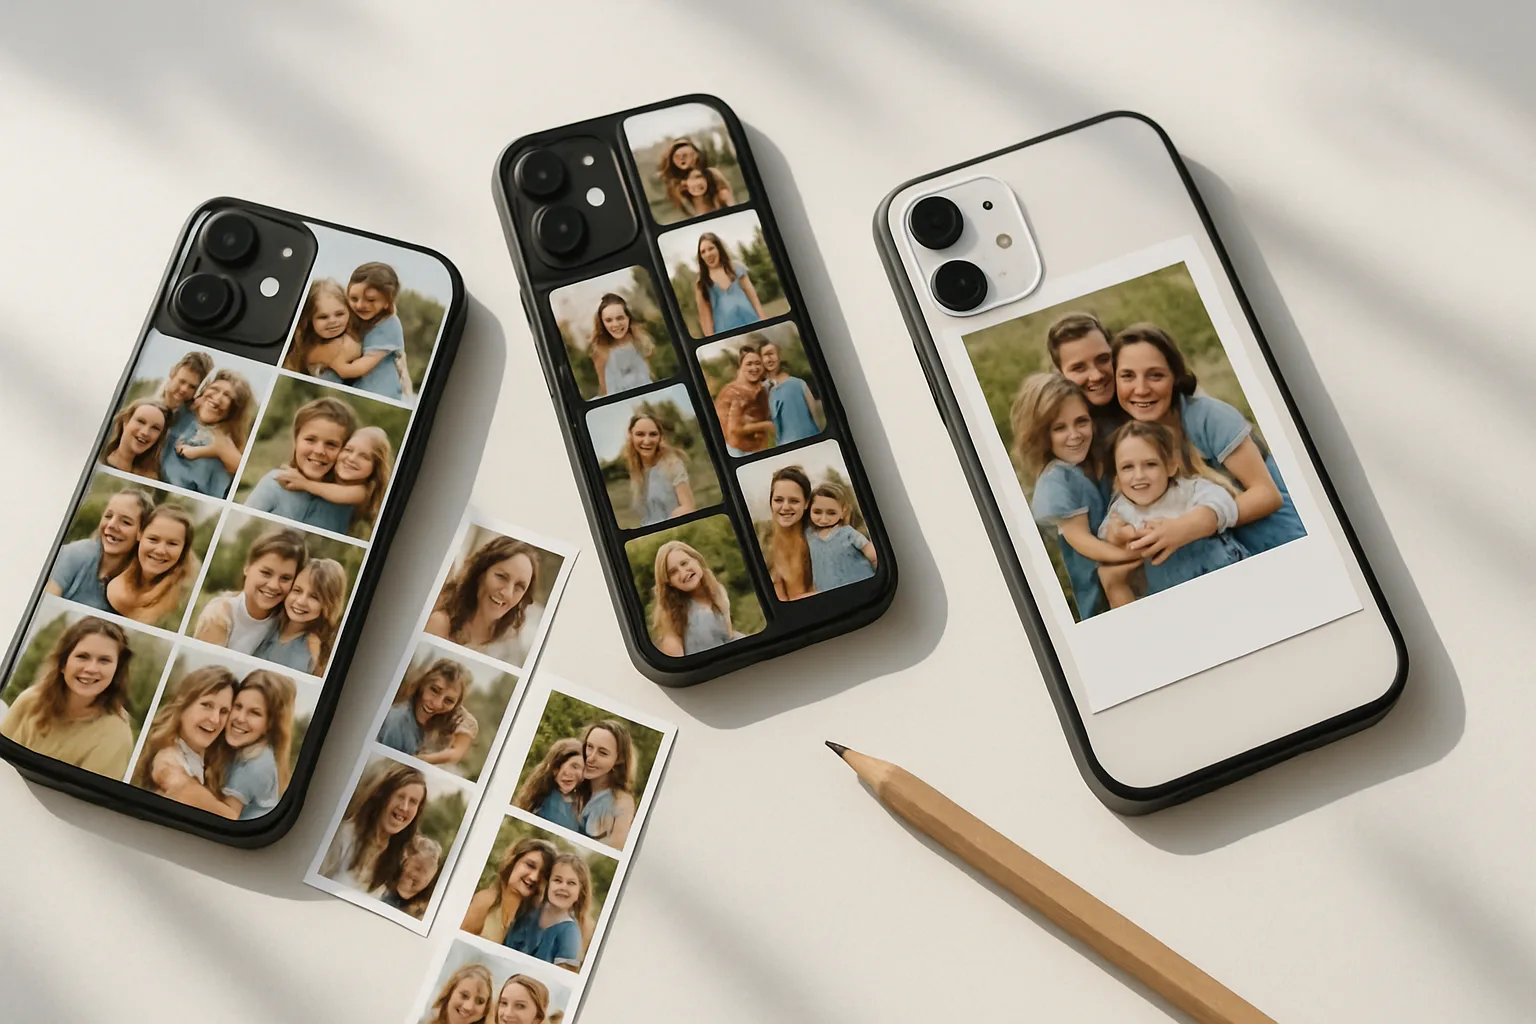
3) Four-photo quilt
Two images on top, two underneath. Simple. Pick one hero portrait of the whole family, then three supporting moments, such as bath time, first day at school and a silly selfie. If the colours clash, switch the set to black and white for instant cohesion.
4) Polaroid-style frames
Give each picture a small white border and a slightly tilted angle, like prints scattered on a table. This works well for playful family energy and can disguise slight resolution differences between images. Keep tilts subtle so text stays readable if you add names or dates.
5) Centre hero with tiny tiles
Place one large photo in the middle, surrounded by six to eight smaller tiles. The centre shot should be sharp and well lit. Use the smaller tiles for close-up details, like tiny hands, favourite toys or the dog’s nose. It feels curated, not busy.
Real-life collage ideas our customers love
Big moments in one place
New baby, first steps, cake-smeared birthday cheeks. We often see parents build a timeline collage from pregnancy scan to first birthday. Add tiny month markers underneath each tile so the story reads clearly without needing long captions.
Holiday highlights
Try a top row of wide scenic shots, then a lower row of family close-ups. For example, a beach panorama, a castle wall and a sunset up top, then sandcastle building, ice creams and a windswept selfie below. If you bring in maps or tickets, photograph them flat in good light so they print cleanly.
Generations together
One square per generation, left to right. Great-grandparents, grandparents, parents, kids. Matching black and white edits tie decades together and give a timeless look. Leave a slim border so faces do not run into the curved edges of the case.
Pet plus people
Pets are family. A sweet layout is three tiles for the humans, one tile just for the pet, then a small caption with their name. If you want more pet inspiration, we have a full guide on making pet photo phone cases with examples that also work beautifully in family collages.
Firsts and favourites
Not milestones, just the good stuff your family actually does. Favourite park bench, the Sunday roast, muddy boots by the door, that slightly wonky Lego tower. These small, honest pictures often print better than posed studio shots, because they carry texture and story.
Design choices that pull a collage together
Pick one colour idea and stick to it
- Neutral backgrounds with a pop of one colour, like red coats or yellow wellies.
- Black and white across all tiles, then one colour accent for a date or name.
- Warm-toned edits for cosy indoor scenes, cooler edits for beach trips.
Consistency makes a collage feel designed. If skin tones vary wildly across photos, a gentle black and white conversion can save the set.
Keep text short and readable
Two or three words per label is enough. Choose a solid font, no hairline scripts. Place text on a semi-opaque strip or a clean border so it does not fight with busy backgrounds. Avoid tiny type near the camera cut-out, it can be trimmed by the print safe area.
Mind the safe area
Every phone has a different camera shape and curved edges. In our editor you will see a safe area, which shows where important content should sit. Keep faces, dates and logos inside it. Let background texture or sky fall outside if needed, that trims cleanly.
Photo quality and print tips from our team
Choose the right shots
- Resolution matters. Aim for original camera files, not screenshots from chat apps. They compress heavily.
- Favour bright, natural light. Grainy, underexposed images can blur on textured cases.
- Crop with intent. For group shots, crop mid-torso rather than across chins or foreheads.
Balance your crops
Mixing very tight close-ups with wide landscapes in one grid often feels lopsided. If your hero shot is close, keep the surrounding tiles mid-close too. If you must include a wide scenic, give it a full-width tile at the top or bottom so it feels purposeful.
Edit lightly
Small tweaks go a long way. Lift shadows a touch, reduce highlights, nudge contrast. Heavy filters can band or shift colours in print. If your collage looks too busy, add slim white lines between tiles, about 2 to 3 mm in the final print, for breathing space.
Think about case finish
Gloss finishes boost colour and make sunny holidays pop. Matte adds a soft, premium feel and cuts glare, which is kind to black and white sets. If you are undecided, look at your chosen photos. High-saturation shots usually sing on gloss, while moody indoor scenes suit matte.
Layout templates you can build quickly
The Year-in-Review
Twelve squares, one per month. Use little season cues, like blossoms in April and scarves in December. Keep a consistent viewpoint, such as the same front door, to underline the time shift.
The Weekend Trio
Three vertical tiles, all from one day. Arrival photo, the main moment, the quiet end. It feels like a story, not a scrapbook.
The Siblings Set
One tile per child, then a joint shot. If ages vary, seat everyone for the group photo so heads line up neatly in the centre.
The Home Tour
Kitchen table, hallway mirror selfie, garden swing, living room fort. This set suits a four-photo quilt and becomes a tiny memory map of your house right now.
Practical build steps in the editor
- Collect 8 to 15 candidate photos. Over-collect, then cut ruthlessly to the best 4 to 9.
- Decide your layout first. Grid, film strip, or centre hero all print predictably.
- Drop the hero image in place, then fill supporting tiles with related shots.
- Add borders if it feels cramped. White lines separate similar colours and prevent faces touching edges.
- Place text last. Keep it large and inside the safe area, away from the camera and corners.
- Preview on your specific model. Different devices shift how the collage sits, especially around camera bumps.
If you are choosing between handsets, our quick guide on what phone case you should get explains case styles and protection in plain terms, which can help before you commit to a collage layout.
Examples by theme, with simple recipes
Beach day on a Samsung
Top row, two wide shots, dune path then sea horizon. Bottom row, three squares, sandy toes, bucket tower, family selfie. Keep the selfie away from the camera cut-out by placing it on the opposite side. Boost warmth slightly to keep skin tones lively.
Newborn on an iPhone
Centre hero sleeping portrait. Around it, four tiny tiles, hospital wristband, tiny feet, first yawn, the knitted hat. Convert the set to black and white if hospital lighting is harsh. Label the centre tile with the name and birth date in a clean sans serif.
City weekend on a Google Pixel
Film strip on the left, three portraits in even spacing, coffee stop, museum grin, rooftop view. On the right, a single colour field from a brick wall shot to carry a short caption. Keep the font white on the darker wall for contrast.
If you already know your phone, you can browse cases by brand, like iPhone personalised cases or Samsung personalised cases, then start building your collage from there. You can also see our latest personalised phone cases across all models.
Thoughtful extras you can add
Handwritten notes
Photograph a short handwritten message on plain white paper and drop it in as a tile. It prints more warmly than a typed note and pairs nicely with Polaroid-style borders.
Children’s artwork
Scan or photograph a favourite drawing in daylight. Trim the background cleanly and give it a white frame so it sits like a mini gallery piece. We have a full walkthrough on turning drawings into a case if you want more detail, see our guide to a children's artwork phone case.
Dates and places
Short and simple. “Whitby 2024”, “First day Year 1”, “Nana’s garden”. Place at the bottom edge of a tile, not across faces. Keep one consistent font weight throughout so it looks intentional.
Common pitfalls to avoid
- Too many tiny faces. If you need to zoom to see who is who, the collage is overcrowded. Cut a tile or go with fewer, larger images.
- Important details on the edge. Curved corners can nibble at hands or text. Nudge key subjects inward.
- Heavy filters across mixed sources. If half your photos are studio-bright and half are dim indoor shots, aggressive filters exaggerate the gap. Keep edits light or go black and white.
- Busy backgrounds behind captions. Add a small solid strip or move the text to a quieter tile.
Getting started with your photo collage phone case
Pick a simple layout, choose your best four to nine images, and keep text short and clear. Whether you are on Google Pixel, Huawei or Oppo, the same design rules apply. Clean crops, consistent colour and respect for the safe area will do most of the heavy lifting. When you are happy with the preview, order with confidence and let the print do the talking.
Ready to make a personalised phone case that actually feels like your family? Start with your favourite four photos and build from there. The best collages are simple, honest and full of little details you will still smile at next year.
Frequently asked questions
How many photos should I use for a family photo phone case?
Four to nine images usually print best. Fewer, larger tiles keep faces readable and avoid tiny details getting lost at the edges.
What image resolution do I need for a photo collage phone case?
Use the original camera files where possible. Avoid screenshots or images saved from chat apps, as compression can blur fine detail in print.
Will the camera cut-out affect my collage layout?
It can if key details sit near it. Keep faces and text inside the safe area shown in the editor, and place background textures near the cut-out instead.
Is matte or gloss better for family collages?
Gloss boosts colour and suits bright outdoor shots. Matte reduces glare and flatters black and white or moody indoor photos. Pick based on your images.
Can I include children’s artwork in my collage?
Yes. Photograph or scan the drawing in good light, crop it cleanly and add a white border so it sits neatly alongside your photos.